My Favorite Brisket Rub

(Also works great on a chuck roast)

Mix together ingredients below and coat meat an hour or more before smoking;
1/4     Cup Dark Brown Sugar
2 1/2  Tbsp Paprika
1 1/2  Tbsp Kosher Salt
1        Tbsp Garlic Powder
1        Tbsp Onion Powder
1        Tbsp Chili Powder
1/2     Tbsp Black Pepper
1/2     Tbsp Dried Parsley
1        Tsp Cayenne Pepper
1        Tsp Ground Cumin
1/2     Tsp Dried Oregano
1/2     Tsp Ground Coriander

During smoking process, baste with;
1/4     Cup Apple Juice
1/4     Cup Bourban

Banana Bread

  • 1/4 cup unsalted butter
  • 1/4 cup virgin coconut oil
  • 1 cup white sugar
  • 2 eggs (beaten)
  • 3 medium bananas
  • 2 cups flour
  • 1 tsp baking soda
  • 1 tsp vanilla

Soften coconut oil and butter, then cream with sugar. Add vanilla. Mash bananas and combine with eggs. Add egg / banana mixture to batter and mix. Sift together baking soda and flour, then stir into batter. Add batter to greased and floured loaf pan. Bake at 325 degrees for 50 to 60 minutes.

Haley’s Chocolate Cake

Haley ran across this recipe from a book that she read at school and she made it in our kitchen to rave reviews from the rest of the family (who all seem to love anything chocolate).

Prepare two 8″ or 9″ pans or one 9″ x 13″ pan by lining with parchment paper or greasing and dusting with flour. Preheat oven to 325°

Cake:
In a large bowl, mix together:

  • 1 1/2 cups Sugar
  • 1 1/4 cups all-purpose flour
  • 3/4 cup unsweetened cocoa
  • 4 tbls buttermilk powder
  • 1/2 tsp baking soda
  • 1/4 tsp salt

In a medium saucepan, melt over low heat:

  • 1 1/2 sticks unsalted butter
  • 8 ounces bittersweet or semisweet chocolate

Remove from heat and add:

  • 1 cup water
  • 4 beaten eggs
  • 1 tsp vanilla

Whisk ingredients into the dry ingredients, just until blended. Pour evenly into prepared pans, bake on the middle rack of oven, about 35 to 40 minutes, or until a toothpick inserted into the cake comes out with moist crumbs adhering to it (do not over bake). Cool thoroughly on a rack before icing.

Easy Frosting
This frosting can also be tinted with food coloring for decoration or writing.

  • 3 cups powdered sugar
  • 1/3 cup softened unsalted butter
  • 1/4 cup water
  • 1 tsp vanilla extract
  • pinch of salt

Combine all ingredients in a large bowl and beat until smooth. If using an electric mixer, beat at low speed. Add more sugar for a stiffer frosting.

Dutch Oven Baked Beans

Ingredients:

  • ½ # Bacon
  • 1 Chopped onion
  • 2 TBS Fresh garlic
  • Salt & Pepper to taste
  • 16 oz bag Great Norther Beans (or 3 cans if in a hurry)
  • up to 4 cups Chicken Broth
  • 1 bottle of full bodied beer
  • 1 cup Brown sugar
  • ½ cup dark Molasses
  • 6 oz can Tomato Paste
  • ¼ cup Cider Vinegar or (Rice Wine Vinegar)
  • 1 tsp Chili Powder
  • 1 tsp Dry Mustard

Instructions:
Fry the bacon in your cast iron Dutch Oven on the stovetop and cook until crispy but not burned, add the onion and garlic (salt – pepper) and cook until onion is translucent, add 4 cups broth, 1 beer, and beans (soaked overnight). Simmer 2 to 2 1/2 hours on stove top or until tender, add additional liquid (broth or beer) as needed during this process. If using canned beans, drain before adding and reduce broth to 3 cups and use 1/2 to 3/4 bottle of beer. Also reduce simmer time to about an hour. While beans are simmering, combine the Molasses, Tomato Paste, Vinegar, Chili Powder, and Dry Mustard in a mixing bown and whisk together. Set aside until beans are ready.  Once beans have simmered to the point of tenderness, Add the rest of the ingredients (ie. the bar-b-que sauce ingredients) to the beans. Bake @ 350 for 2 hours, reduce temp to 250 for additional hour. Add more beer and / or broth if beans start to get dry during baking. Another option is to move the Dutch Oven outside to your grill for the baking phase and I like to finish that last hour with the lid off and adding some wood chips to the smoke box in my grill to add some nice smoke to the beans as they finish.

Homemade Pizza – Bread Machine Recipe

Preheat bread machine bread pan by filling with hot water and place aside.  Add 1 1/3 cups water to a microwave safe measuring cup.  Add 2 Tbs unsalted butter to the water.  Microwave on high for 30 seconds.  Stir and microwave on high for another 30 seconds.  Water should be around 130 degrees (cool or heat more if needed).  Dump out bread pan and dry.  Bread pan should now be warm to the touch but not hot.  Make sure mixing blade is installed and add water / butter mixture to the pan.  add 2 Tbs sugar and 2 tsp salt to the water in the bread pan.  Add on top of that, 4 cups all purpose flour.  Make a small hole, not too deep, into the top of the flour in the bread pan.  Add, into the hole, 1 packet highly active yeast (2 tsp).  Place bread pan into bread machine and select dough cycle.  Start machine.  Should take 1 1/2 to 2 hours, depending on your machine.  When complete, dump dough out onto lightly floured surface and punch down.  Preheat oven to 400 degrees.  Divide dough into two parts.  Each part is one pizza crust.  Stretch, roll, hand toss, whatever works for you to get the dough to the size of your pizza pans.  I put a light coating of olive oil on the pizza pans then place dough onto them and let rest for 20 minutes to rise.  Coat with your favorite pizza sauce (we buy a jar from the supermarket).  Add your favorite toppings and top each pizza with 1/2 pound of shredded mozzarella cheese.  Bake in over for 14 -16 minutes or until cheese has browned sufficiently.  Remove and cut into slices with a pizza wheel.

I Can’t Believe You Put That Much Chocolate in Your Birthday Cake – Cake Recipe

This is a three layer, fairly dense, chocolate cake with a light whipped cream based frosting.  It seems to taste even better on day two and three then it did on the first.  It’s possible that it might taste great on the forth day, but we cannot verify that as it does not seem to last that long.

Ingredients: 

Cake

  • 1 cup unsalted butter
  • 1 1/4 cups light brown sugar
  • 4 eggs
  • 2 tsp vanilla
  • 1 cup sour cream
  • 3 (4oz bars) Bakers German’s Sweet Chocolate
  • 2 cups boiled water
  • 4 cups all purpose flour
  • 1 tsp salt
  • 2 tsp baking soda

Frosting

  • 1/2 cup sugar
  • 1/2 cup cocoa powder
  • 1 cup heavy cream
  • 2 tsp vanilla

Directions: 

Place a metal mixing bowl and the whisk attachments for your mixer in the freezer for a couple of hours to chill.  Preheat oven to 300 degrees.  Grease and flour three 9 inch cake pans.  Break up chocolate bars and place into very hot (nearly boiling) water and set aside.  Using an electric stand mixer, begin by creaming the butter and brown sugar together.  Add, one at a time, the eggs.  Then add the vanilla and sour cream and mix.  Sift together the dry ingredients and set aside.  By now, the chocolate should be very soft.  Stir the chocolate / water mixture together.  With mixer on low, add the dry ingredients and the chocolate mixture to the batter in parts, 1/3 of each at a time and alternating between the two.  Once all of the ingredients are added to batter, increase mixer speed briefly to blend batter stopping to scrape down the sides with a spatula.  Be careful not to over mix though.  Pour evenly into the three cake pans and place in over.  Bake for aprox. 40 minutes or until toothpick comes out clean.  Cool for a few minutes before turning pans upside down over a cooling rack to release cake.  Cool cake completely before frosting.

When ready to frost, retrieve mixing bowl and whisk attachments from freezer.  Add cream, cocoa, and sugar and beat on high until fluffy but not dry.  I use a bread knife to cut the rounded top of two of the cake loaves, saving the third for the top layer.  Use the frosting between layers and to cover cake.  We refrigerate cake, but find it serves better at room temp.

Enjoy!


Beef Tacos Carne Asada with garden fresh Pico de Gallo

The Meat:
First, a little bit about the cut of beef I use in this recipe.  I am, after all, a professional meat cutter.  If you don’t care about the specifics of the beef cut then you can skip down to the recipe below.  Traditionally carne asada is made from beef flank or skirt steak however, these cuts of beef have become quite expensive in recent years.  The Hispanic customers I often serve use a variety of thinly sliced beef for their carne asada. For my recipe I use the beef chuck spider muscle (serratus ventralis).  This muscle group is located between the chuck eye and the blade on the chuck primal.  It is sometimes referred to as the beef chuck underblade steak or more recently, the Denver steak.  I should mention however, that I know several meat cutters who are incorrectly cutting this muscle and even including an additional muscle group that is positioned next to the spider muscle when they cut Denver steaks.  This, in my opinion causes their Denver steaks to be less tender than they should be (but I digress…).  If you would like to see further where this muscle is located then follow this link to an informative video on how to cut it. Meat butchery and seam cutting demonstration of Denver Steak of beef.  For my recipe, after seeming out and separating the spider muscle, rather than making Denver steaks, I thinly slice the muscle directly cross grain.  Then cut the slices into small strips (slightly smaller than stir fry sized).  I use 3 to 3 1/2 pounds for the recipe below (about 1 whole serratus ventralis muscle).

Carne Asada:
Start by making the marinade for the meat.  Those ingredients are:

  • 1 tsp salt
  • 1 tsp finely ground black pepper
  • 1 tsp finely ground white pepper
  • 1 tsp paprika
  • 1 tsp ground oregano
  • 1 tsp ground cumin
  • 1 tsp garlic powder
  • 1 tsp dark chili powder
  • 6 cloves fresh garlic, finely chopped
  • 1/3 cup white vinegar
  • 1/2 cup olive oil
  • 1/2 cup soy sauce
  • juice of 2 whole fresh limes

Whisk all of the above ingredients together. Place the 3 pounds of meat mentioned above into a 2 gal. sized zip bag and pour the marinade over it. Zip up the bag and work the meat and marinade together then place the bag into a pan (to avoid a mess if there is a leak) and place into the fridge for about 8 hours. Turn it over a couple of times to make sure all of the meat has maximum contact. When ready to prepare, dump the entire contents, meat and marinade into a large skillet and cook. Continue to cook until the liquid has cooked off and the meat is just slightly caramelized.

Pico de Gallo: (fresh authentic Mexican style salsa)
Ingredients as follows: (wear gloves for the pepper handling, you’ve been warned…)

  • 4 – 5 small to medium sized tomatoes, diced (from our garden, of course)
  • 1/2 white onion, finely diced
  • 1/4 bunch cilantro, finely chopped
  • 2 – 3 cloves garlic, finely chopped
  • 3 – 4 small green jalapenos, seeded and finely chopped (also from our garden)
  • 1 habanero pepper, seeded and finely chopped (if you dare, and I do! grew these in garden for the first time last summer)
  • 1 or 2 fresh red hot chili peppers, seeded and finely chopped (been growing these for a couple of years in our garden – very spicy, love ’em)
  • juice of 1/2 lemon
  • 1 tsp salt

Combine all ingredients and carefully stir. Refrigerate until ready to serve.  This fresh salsa   will not hold up like cooked salsa so use within a couple of days.

Serve in gently warmed small diameter flour tortillas.  Add a couple of tablespoons of the carne asada to the center of the tortilla.  Spoon a teaspoon or more (depending on taste) of the pico de gallo over the top.  If you are so inclined, you can dollop some mole verde or some finely shredded quesadilla cheese (or both) over the top.  Fold tortilla over like any other soft taco and enjoy…

A fresh lime juice, top shelf tequila derived, shaken margarita is the perfect compliment to the fire lit by this awesome meal…

My Cherry Pie

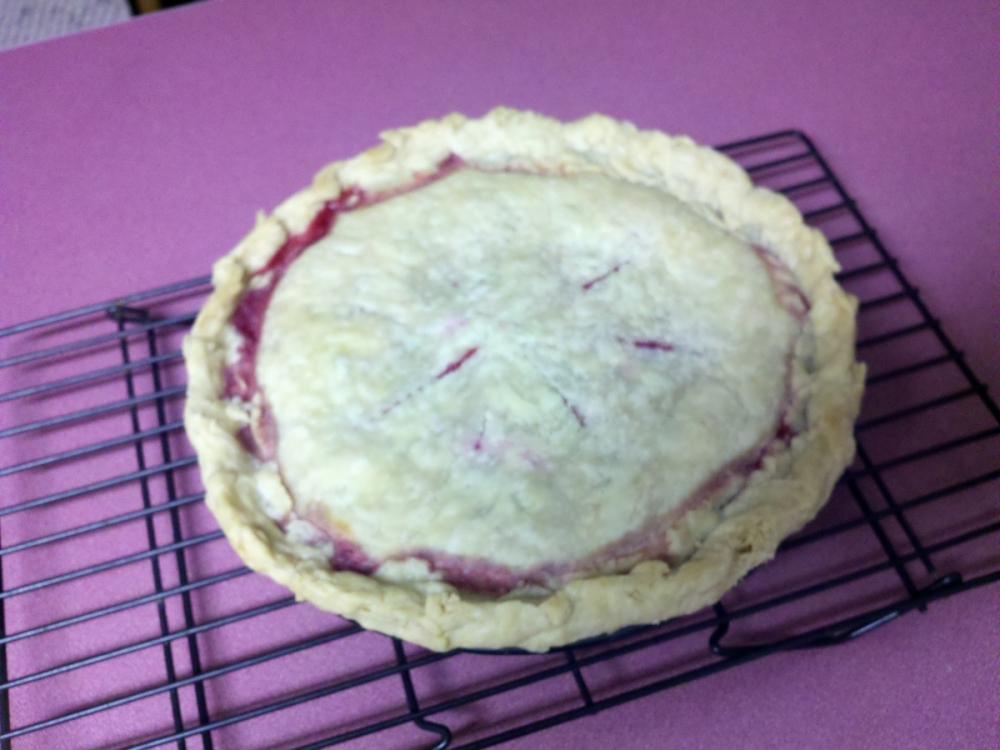
I have been asked for the recipe for my cherry pie often and have intended to add it to this page for some time. Finally getting to it… This recipe makes 1 12″ pie

Ingredients:

Crust:

  • 2 cups Flour
  • 1 tsp Salt
  • 2/3 cup Butter Flavored Crisco
  • 2 TBS Unsalted Butter
  • 5 TBS Ice Cold Water

Filling:

  • 2 Pounds IQF Sour Cherries
  • 1 1/3 cups Granulated Sugar
  • 3+ TBS Minute Tapioca
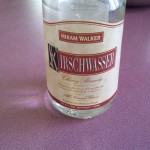
  • 2 TBS Kirschwasser
  • 2 tsp Imitation Vanilla
  • 2 TBS Unsalted Butter

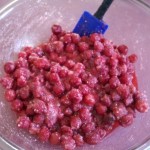
Directions: Start thawing aproximately 2 pound of IQF (individually quick frozen) sour pie cherries in a colander inside of a mixing bowl. I purchase premium IQF cherries in bulk from a local wholesaler, but a near equivalent product could be purchased from your neighborhood supermarket. Thaw them until they are pretty soft but still cold. If you thaw them too long they will lose too much of their juices. If they are not thawed enough you will need to add oven time for the filling to come to a boil inside the pie. When the cherries are ready, begin preheating the oven to 450° F. Then start puting together the pie filling. Start by wisking together 1 1/3 cups sugar with 3 tablespoon of minute tapioca. Mix thouroghly before adding the next ingredients. Add 2 teaspoons of vanilla.And now for the ‘secret ingredient’. Kirsch! According to Encyclopedia Britannica Kirschwasser or Kirsch is a dry, colourless brandy distilled from the fermented juice of the black morello cherry and is made in the Black Forest of Germany. Irregardless of what it is or where it comes from Kirsch gives this cherry pie a little extra “ooomph”!! Add 2 tablespoon of kirsch to the sugar mixture and mix together thoroughly before going further. Now carefully fold the thawed cherries (be careful not to crush them) into the sugar mixture and set aside (photo right).

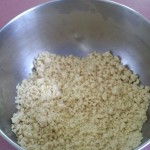
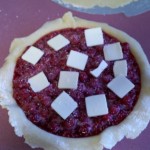
Now begin making the crust by sifting 2 cups of flour with 1 teaspoon of salt into a different mixing bowl. Add 2/3 cup butter flavored Crisco and 2 tablespoon of chilled unsalted butter. Use a pastry blender (I use a table fork, works better for me) to combine until mixture is about the size of small gravel (photo left). At this point add 5 tablespoons of very cold water (ice water). It is important NOT to overmix the dough once the water is added as it will alter the texture of the finished crust. Just fold together enough to get everything stuck together. Divide dough into two parts and roll out the first part for your bottom crust. I use a silicone pie mat for this. If you don’t have one available consider using a sheet of wax paper. Once rolled out, flip dough onto your pie pan and carefully center it down into the pan. Roll out top crust the same way and leave on your mat or wax paper until ready to cover pie. Dump the pie filling into the bottom crust you placed into the pie pan making sure you get all of the yummy stuff scraped out of the mixing bowl and fairly evenly distributed into the pie shell. You’re not quite ready to cover the pie yet though. I sprinkle a little more tapioca onto the pie filling at this point (not more then about a teaspoon). Then drop thin slices of chilled unsalted butter onto the top of the pie. About 2 tablespoons worth. Now cover the pie with the top crust and crimp together with the bottom crust. poke a few very small vent holes or slits into the to crust to vent out the steam. Place pie on a foil covered baking sheet and put into preheated oven for 10 minutes. Then turn down the oven temp. to 350° F and bake for another 40 – 45 minutes depending on your oven (mine is 41 minutes unless the cherries were still a little icy after thawing, then it’s closer to 45). After removing from oven, cool on a rack for a min. of 3 hours before cutting into it (overnight is better, but it’s tough to leave this pie alone on the counter that long….) Good Luck

Yes, my counter really is that color. No, I didn’t build this kitchen. Yes, a kitchen remodel is on my “honey-do” list. No, it won’t be happening this year… Thanks for asking… 🙂

Buttermilk Biscuits

Ingredients:
1 3/4 cups all-purpose flour
1/2 tsp. salt
1 tsp. sugar
2 tsp. double-acting baking powder
1/2 tsp. baking soda
5 TB. unsalted butter
3/4 cup buttermilk

Directions:

  1. Preheat oven to 450 deg. F.
  2. sift together dry ingredients.
  3. cut in butter with pastry blender or fork, until well blended.
  4. add buttermilk and lightly mix.
  5. turn dough out onto a floured board, knead it briefly, then roll out to a thickness of about 1/4 inch. cut with a biscuit cutter.
  6. bake for 10 to 12 min.

Homemade Glazed Donuts

Ingredients:

Dough:
2 packest active dry yeast
1/4 cup warm water (105 to 115 degrees)
1 1/2 cups lukewarm milk
1/2 cup white sugar
1 teaspoon salt
2 eggs
1/3 cup shortening
5 cups all-purpose flour
1 quart vegetable oil for frying

Glaze:
1/3 cup butter
2 cups powdered sugar
1 1/2 teaspoons vanilla
4 tablespoons hot water or as needed – I often end up using more as the glaze stiffens as it sits.

Directions:

  1. Sprinkle the yeast over the warm water, and let stand for 5 minutes, or until foamy.
  2. In a large bowl, mix together the yeast mixture, milk, sugar, salt, eggs, shortening, and 2 cups of the flour. Mix for a few minutes at low speed, or stirring with a wooden spoon. Beat in remaining flour 1/2 cup at a time, until the dough no longer sticks to the bowl. Knead for about 5 minutes, or until smooth and elastic. Place the dough into a greased bowl, and cover. Set in a warm place to rise until double. Dough is ready if you touch it, and the indention remains.
  3. Turn the dough out onto a floured surface, and gently roll out to 1/2 inch thickness. Cut with a floured doughnut cutter. Let doughnuts sit out to rise again until double. Cover loosely with a cloth.
  4. Melt butter in a saucepan over medium heat. Stir in powdered sugar and vanilla until smooth. Remove from heat, and stir in hot water one tablespoon at a time until the icing is somewhat thin, but not watery. Set aside.
  5. Heat oil in a deep-fryer or large heavy skillet to 350 degrees F. Slide doughnuts into the hot oil using a wide spatula. Turn doughnuts over as they rise to the surface. Fry doughnuts on each side until golden brown. Remove from hot oil, to drain on a wire rack. Dip doughnuts into the glaze while still hot, and set onto wire racks to drain off excess. Place a brown paper grocery sack under the rack for easier cleanup.

Very Chocolate, Chocolate Brownies

Ingredients:

Brownies:
1 1/3 cup all-purpose flour
1 3/4 cup sugar
4 tablespoons unsweetened cocoa powder
1 teaspoon baking powder
1 teaspoon vanilla extract
3/4 cup butter
3 fl oz boiling water
3 eggs
4 oz chocolate chips

Frosting:
1/3 cup butter
8 oz semisweet dark chocolate
2 tablespoon light corn syrup
2 tablespoon hot very strong coffee

Directions:

  1. Preheat oven to 350 deg F.
  2. Line a 13 x 9 in. cake tin with parchment paper.
  3. Melt the butter in a saucepan.
  4. In a bowl combine flour, sugar, cocoa powder, baking powder and vanilla extract.
  5. Add eggs, melted butter and hot water and mix until smooth.
  6. Add chocolate chips.
  7. Bake at 350 degrees F until a wooden pick inserted in center comes out clean, approximately 20-30 minutes.
  8. Cool the cake. Glace with the chocolate frosting.
  9. For the frosting, mix butter, chopped chocolate, syrup and coffee and heat in a double boiler until melted. Stir until smooth and spread over the cake.

3 Layer Chocolate Cake (cocoa powder)

Ingredients:

  • 1 c. cocoa powder
  • 2 c. boiling water


  • 1 c. unsalted butter (room temp) (cake ingredient)
  • 2 1/2 c. granulated white sugar
  • 4 eggs (room temp)
  • 1 1/2 tsp. vanilla extract


  • 2 3/4 c. all purpose flour
  • 2 tsp. baking soda
  • 1/2 tsp. baking powder
  • 1/2 tsp salt


  • 6 oz. semi-sweet baking chocolate
  • 1/4 c. heavy cream
  • 2 to 6 Tbs. milk
  • 3/4 c. unsalted butter (frosting ingredient)
  • 2 1/2 c. powdered sugar

Directions:

  1. Preheat oven to 350° F. Prepare 3 9″ round cake pans by either using the grease and flour method or line pans with parchment paper.
  2. In a medium bowl prepare chocolate by stiring the cocoa powder and boiling water together until smooth, then set aside.
  3. In a seperate bowl combine flour, baking soda, baking powder, and salt. Sift together and set aside.
  4. Using an electric stand mixer and bowl, cream together butter and granulated sugar for 5 min. or until well creamed.
  5. Add the eggs, one at a time, beating well after each addition. Then mix in the vanilla.
  6. Turn the mixer down to low speed. Alternating between the dry ingredients and the chocolate mixture, add these to the creamed mixture beginning with and ending with the dry ingredients. (Dry ingredients in 3 parts and chocolate mixture in 2 parts). Do NOT over beat the mixture once the flour is added.
  7. Pour batter in equal parts into the 3 prepared cake pans and bake for 20 to 25 min.
  8. Cool in pans for 10 min., then invert onto cooling racks and remove pans. Cool completly before frosting.
  9. When ready for frosting, prepare chocolate frosting as follows:
  10. Combine semi-sweet baking chocolate, butter and, cream in a heavy saucepan.
  11. Cook over low to medium heat, stirring constantly until chocolate is melted thouroghly blended.
  12. Gradually add powdered sugar stirring well
  13. Cool saucepan containing chocolate in an ice bath and beat on low speed with a portable electric mixer until frosting begins to loose it’s gloss and holds it’s shape.
  14. Add milk a tablespoon at a time to achieve proper spreading consistancy.
  15. Trim curved tops of cake layers as necessary with cerated bread knife.
  16. Stack cake layers using a layer of frosting in between each layer.
  17. Use remaining frosting to coat sides and top of cake.
  18. Store covered for up to 3 days.

Breakfast Sausage

Ingredients:
4 pounds lean boneless pork shoulder (cut into 1/2 diameter cubes).
1 pound pork fat (cut into dime size pieces).
5 tsp canning salt
1/2 tsp. dried parsley
1 tsp rubbed sage
1 1/4 tsp black pepper
1 1/2 tsp crushed red pepper flakes
1 1/4 tsp coriander
1 1/4 MSG
1 1/4 cayenne red pepper

Directions:

  1. Process the seasonings in a food processor until thoroughly blended, let the dust settle before opening lid (very potent).
  2. Mix the fat pieces and lean pieces together, then gradually add the seasonings and toss thoroughly, refrigerate for at least an hour before continuing.
  3. for best results chill the grinder pieces also.
  4. Grind seasoned pork once through a sausage plate, then mix by hand.
  5. package sausage as desired and freeze (I make patties, and freeze them on cookie sheets, then bag in zip bags after frozen)

Way Easy Bread Machine White Bread

Found this recipe on the internet several years ago, now we never buy bread mixes, because this is so easy, so cheap, and WAY delicious!

Fill your bread machine’s bread pan with hot water to preheat and set aside. Meanwhile, in a glass measuring cup add:

  • 1 1/4 cups 2% milk
  • 2 tablespoons unsalted real dairy butter

Heat in the microwave on high for 30 seconds, stir, then back into the microwave for 30 more seconds. Set aside while you prepare the dry ingredients.

Sift together:

  • 3 cups all purpose flour
  • 1 1/2 tablespoons sugar
  • 1 1/2 teaspoons salt

Dump out the water from the bread pan and dry, don’t forget to insert the mixing blade in the bread pan. Pour the warm milk/butter mixture into the bread pan. Next, pour the flour mixture onto the bread pan and tap pan to level.

Make a small hole in the flour mixture, and add to the hole:

  • 1 packet highly active dry yeast

Place filled bread pan into the bread machine and select ‘Basic White’ setting and start. Makes a delicious loaf of homemade bread.

using the ‘delay’ setting is not recommended due to the dairy products in the recipe.

My Kids’ Favorite Cinnamon Rolls

Ingredients:
4 ¾ c. + All Purpose Flour
1 c. + 2 tbsp. Milk
1/3 c. Sugar
1 pkg. Active Dry Yeast
½ tsp. Salt
Apr. 1 ¾ c. Butter
3 Eggs
1 ½ c. Packed Brown Sugar
1 tbsp. Ground Cinnamon
2 tbsp. Vanilla Extract

Directions:

  1. In a large mixing bowl, combine 2 ¼ cups of flour and 1 pkg. yeast. Meanwhile, in a small saucepan, stir constantly while heating 1 c. milk, 1/3 c. butter, 1/3 c. sugar, and ½ tsp. salt until warm (120 to 130 degrees). Add to flour and yeast. Add eggs. Beat with electric mixer on low for 30 seconds, scraping sides. Beat on high for 3 minutes. Stir in 2 ¼ c. flour.
  2. Turn dough out onto lightly floured surface. Knead in enough flour to make a moderately soft dough that is smooth and elastic, 3 to 5 minutes total. Shape into a ball. Place into a greased bowl, cover, let rise in a warm place until double (about 1 hour).
  3. While dough is rising, combine ¾ c. packed brown sugar and ¾ c. butter in small saucepan. Heat slowly, bringing to a boil, being careful not to overcook. Remove from heat. Stir in 2 tbsp. Milk, and 2 tsp. vanilla. Cool slightly, then pour into greased 9 x 13 baking pan. Set aside.
  4. For filling, combine ¾ c. packed brown sugar, ¼ c. flour, and 1 tbsp. Cinnamon. Cut in ½ c. butter. Becomes a thick paste.
  5. After rising, punch dough down. Turn onto lightly floured surface. Let rest for about 10 minutes. Roll dough into approximately a 15-12” wide x 12-15” long rectangle. Spread filling onto dough. Roll up starting at one of the narrow sides. Cut into 15 slices. Arrange into baking pan set aside earlier. Brush on 2-4 tbsp melted butter. Let rise 45 min. Then bake at 375 deg. For approx. 20-25 min.